Wednesday, August 1, 2012

Two Birthdays & The food


Summer is a full birthday season in my house. My son, who was originally due on my birthday, July 27th, but born earlier on the 11th, and my husband whose birthday is in August, makes for an active kitchen. And a busy Mom.

This year, because it was my little cub's first birthday, I really wanted to do something special.
I planned a small party and invited family that had yet to meet Barrett. Turning 1 is a big milestone, but let's face it, more for Mom and Dad than for baby, to whom a Sunday party is just a Sunday, with new people and more noise.

I put together a menu of some of my favorite recipes and worked for days on very little sleep to make food from scratch I just hoped everyone would love. In the end, it was worth it. And they did.

These last-minute super simple Watermelon Triangles on popsicle sticks were a big hit. And a fun option to pick up served alongside a large fruit salad of various balled melons, berries, grapes and pineapple drizzled with just a hint of raw Arizona honey.


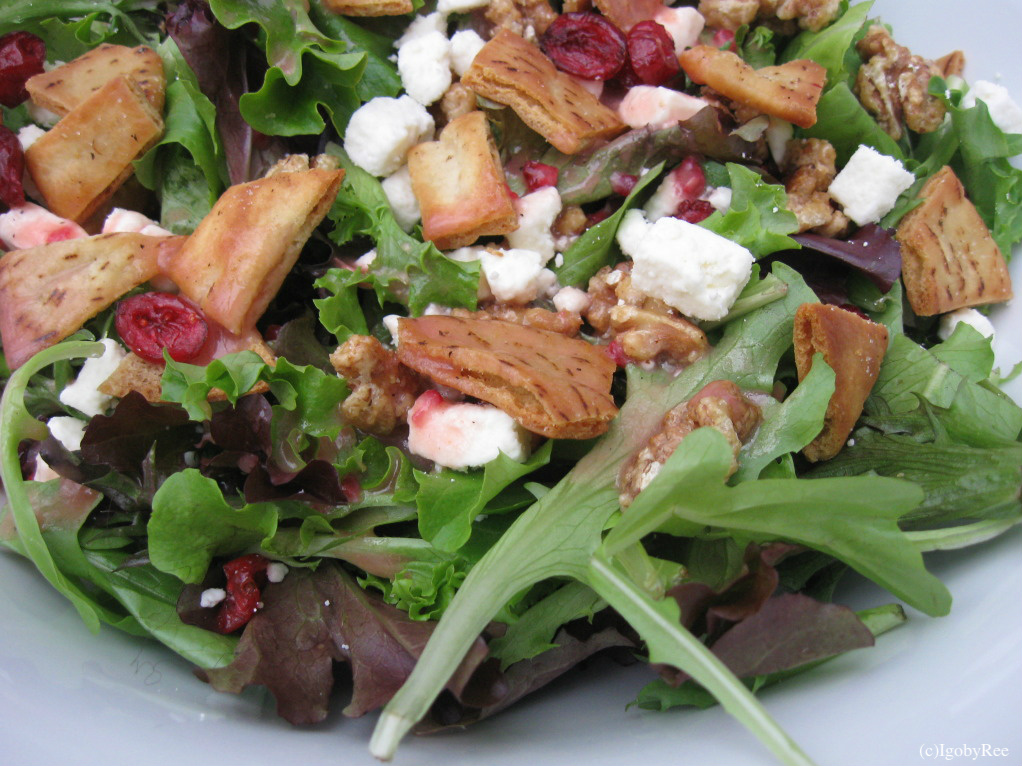
Do you remember the Corn and Black Bean Salad, one of my all-time favorite recipes I blogged about in 2010? I make it every summer now, at least twice. It's perfect for parites, and our guests gobbled it up.

The bean salad with sweet bites of grilled corn and mango was a fitting match for the bright Citrus Marinated Chicken Skewers served with a tangy Tzaziki Dipping Sauce that was packed with fresh dill and parsley from my garden. These were gone in no time.


Just for good measure, I made my best spicy red sauce served over al dente penne. And, to my surprise, that vanished too. Before I was able to snap a photo. I must make a note to blog about it come fall.

Finally, after placing the cakes on the table in advance to tempt our guests, a few people pleaded 'When can we cut the cake?!' I made my two absolute favorite cakes: Carrot Pineapple & Strawberry Shortcake served with homemade vanilla ice cream. It was time to sing 'Happy Birthday' and dig in to our slightly melted, super delicious desserts.


Daph and I will always remember such a special day we were able to share with the people we love in celebration of the person we cherish the most. And one day we'll show him the pictures.

When my 33rd birthday arrived, I was all out of ideas having already made my two favorite cakes earlier in the month. My husband suggested an ice cream cake. He knows how much I love ice cream. I thought it was brilliant, and instantly remembered describing a banana split to him (my husband) just the day before. I had been craving one for months. That's it...
Id' make a Banana Split Ice Cream Cake.

I searched online for inspiration and found this stand out on browneyedbaker.  Making everything completely from scratch was quite labor intensive.

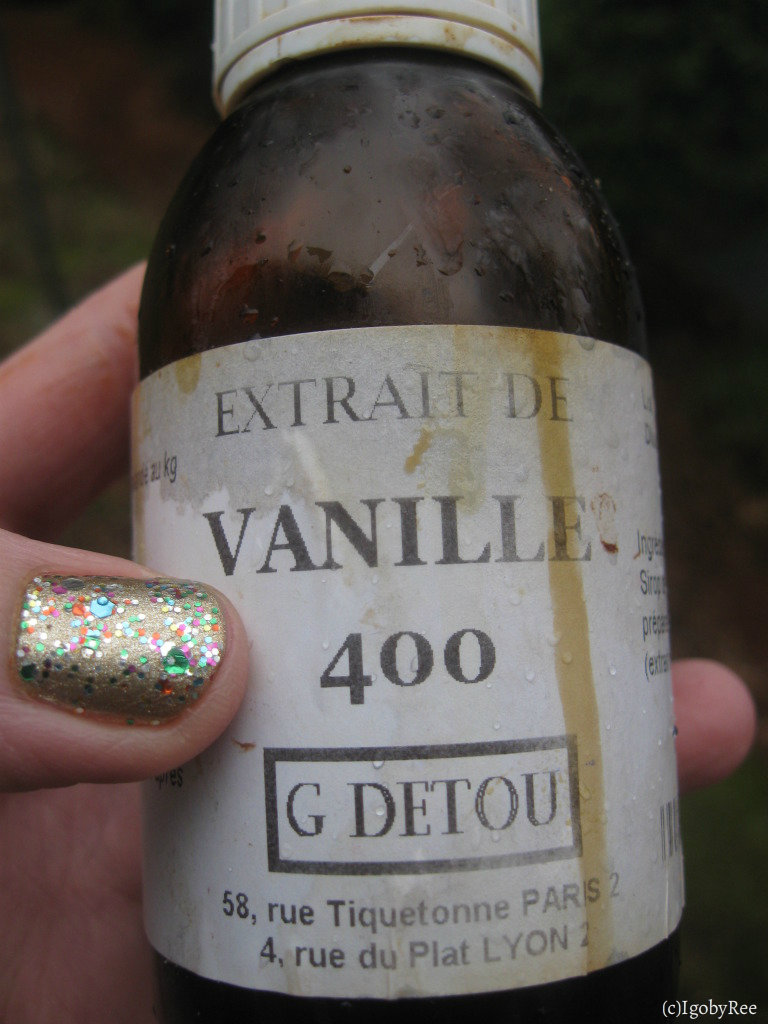
A layer of Chocolate Wafer Cookie crust, a layer of ripe bananas, followed by Roasted Strawberry Ice Cream, Strawberry Sauce (sans vanilla), Milk Chocolate Ice Cream, Hot Fudge (sans mint), Madagascar Vanilla Bean Ice Cream and, once frozen overnight, topped with Pineapple Topping (cinnamon omitted). Garnished with freshly whipped cream, chopped walnuts and maraschino cherries. I used Jeni's Splendid Ice Creams at Home for the recipes, replacing whole milk in place of buttermilk in the strawberry ice cream, using whole milk in place of the evaporated milk in the chocolate and Madagascar vanilla bean in place of Ugandan in the vanilla.

In no way am I being superfluous when I tell you this was the most amazing cake we've ever had!


Seriously, the best ever!

I toasted to my new year with a fruity Margarita, using Ginger Syrup and five ripe Peaches, peeled, sliced and macerated in 2 tablespoons of sugar overnight, to use with the juice in place of the nectar.
What a yummy way to close out a heavenly month of food and firsts'.


Wednesday, July 11, 2012

Happy 1st Birthday, Barrett Leo!


One year ago, July 11th, I gave birth to my greatest joy. Today we welcome Barrett Leo to his very first birthday. I'm so grateful for this day. Albeit, a bit emotional too. You hear it said a lot, "Time flies." And it really does. But maybe more true than that--there are moments when you're a new parent where you look at this precious new baby and you're so struck by the the sheer awesomeness of it all: having carried life, feeling so blessed to have brought this beautiful child into the world; The paragon of humanness--so small and precious and curious. Their smell, so sweet. The way they look up at you, and the knowing pang you feel in your heart when they do because you, you are beholden to nurture all of this promise into something great.


You do your best, and the reward is an uttered "Mama" or "Papa", and little hands reaching up for you who they trust implicitly in a moment of need. You know then you're doing all you can to make them feel safe. Countless hours on a floor that reminds you of your age and their protests and screams, but finally sitting up without your help because they can do it now. Pulling themselves forward, faster and faster towards his favorite toy. He peers back to make sure I'm watching, impressed. I am, little cub, so proud. Even faster and faster still. Giggling all the while. Reaffirmed in your hard work, your patience and immeasurable love, despite any shortcomings you may have worried over all those early months. You're fulfilled.

 You watch, and soon they're standing, holding on to something without your help. It's in a moment like this where it hits you, you're not losing time, you're filling in the lines that time creates with the color of your life, and drawing past them with the permanence of those very moments you'll always remember. Etched into the pavement of your heart, the only place where time is truly inconsequential. And it's bittersweet.

There's only one point in anyone's life where they will be this innocent, so consistently pure juxtaposed against the ebb and flow of all other reality. Childhood is a dream. One in which you close your eyes and wrap your arms tightly around, if only to preserve just a bit longer.
You know the days are numbered before these little lives will belong more to the world than they do to you, in the way they do right now. But if you've done your job, that's exactly what you want.

And all that really matters, is right now.

In honor of my Barrett Leo on his first year, we say: "Hooray", "Hooray." We love you. Happy birthday/ Joyeux anniversaire, our baby boy.


Tuesday, July 3, 2012

Happy 4th of July & Strawberry Shortcake


The first time I made this cake, in February, was for my brother Billy's 26th birthday.
I think everyone who bakes has at least one chocolate cake under their belt they're really happy about. Chocolate is easy...it does most of the work for you--lending itself perfectly to a cake that is sweet, not too sweet; Rich and decadent. But not so decadent you can't enjoy a big piece in place of dinner without feeling like you've lost your will to go on a third of the way through. And moist. Maybe the first thing anyone notices after biting into a piece of cake...how moist it is.

To the contrary, a great vanilla cake is an elusive thing. Of course the right frosting goes a long way on a so-so cake. But the perfect vanilla cake would be one you could eat with no frosting at all, and not even notice until you were done. Vanilla should be both vibrant and fruity, plus delicate and nuanced. It's a fine balance, vanilla cake. And moist. Maybe the first thing anyone notices is missing after taking a bite of dry, so-so vanilla cake.

I searched and searched for a vanilla cake worthy of starring as the lead to the cake my brother requested--his favorite, strawberry shortcake, before coming upon this...Without a doubt, my new, absolute favorite go-to vanilla cake.

I topped it with berries and knew immediately--donned in red, white and blue, I would save it for just this occasion. Happy 4th of July, Friends!

Strawberry Shortcake Filling


Ingredients:

1/2 cup water
1 tablespoon and 1-1/2 teaspoons cornstarch
1-1/4 cups fresh strawberries, sliced (You could use frozen instead)
1/4 cup and 2 tablespoons white sugar

1. In large saucepan, whisk together water and cornstarch

2. Add in sliced strawberries and sugar, stir

3 Over low-medium heat for 5-7 minutes, until somewhat broken down

4. Set aside and allow to cool completely before use.

Vanilla Simple Syrup
1/4 cup granulated white sugar
1/4 cup water
1/2 vanilla bean, scraped (Optional)

Combine 1/4 cup sugar plus 1/4 cup of water in medium saucepan. Split and scrape down half of vanilla bean. Add vanilla bean seeds and scraped vanilla bean to pan. Cook over low-medium heat and stir until sugar has dissolved. Set aside to cool completely.

Fluffy Vanilla Cake

Recipe courtesy and slightly adapted from Sweetapolita


Yield: One 2-layer, 8-inch round cake

Ingredients

5 large egg whites (5 ounces/150 grams) at room temperature

1 cup whole milk (180 mL/6 liquid ounces), at room temperature

2 1/4 teaspoons very good quality pure vanilla extract (9 grams)

2 3/4 cups cake flour, sifted (11 ounces/315 grams)

1 3/4 cups sugar (12 ounces/350 grams)

1 tablespoon + 1 teaspoon baking powder (19.5 grams)

3/4 teaspoon salt (5 grams)

12 tablespoons unsalted butter (6 ounces/170 grams), at room temperature and cut into cubes
*It's important to use a good quality vanilla as that is all the taste of the cake. My mother-in-law brought this gorgeous vanilla extract with her for me last summer from Paris.


Directions:

1. Set oven to 350 degrees F to preheat. Meanwhile, butter and flour, or line two 8-inch cake pans with parchment.

2. Add egg whites, 1/2 cup of milk, and vanilla. Stir and put aside.

3. Fit mixer with paddle attachment, or use hand mixer and large bowl. To bowl of mixer, add dry ingredients and mix for 30 seconds.

4. On low speed, mix in butter and final 1/2 cup of milk to dry ingredients just until moistened. Turn speed up to medium and continue mixing for 1 and 1/2 minutes, until incorporated.

5. Scrape down sides of bowl. In three separate batches, add in egg mixture, mixing for 20 seconds after each addition.

6. Into prepared pans, divide cake batter evenly; spread top of batter with offset spatula to level. Weigh each pan to ensure evenness, if you have a scale. (I don't).

7. Bake between 25-35 minutes, or until an inserted cake tester is removed cleanly. It is important to not over bake cakes. After 20 minutes, no sooner, check for doneness. Continue checking every 2 minutes thereafter until done. Allow to cool on racks for 10 minutes before using small metal spatula to loosen cakes from sides of pans. Gently turn out onto greased cake racks. Be very careful when flipping right-side up.

8. Allow cakes to cool completely.
Whipped Cream Frosting
Recipe courtesy Allrecipes.com


1 (8 ounce) package cream cheese, softened. I like Philadelphia.
1/2 cup granulated white sugar
 1 teaspoon vanilla extract
2 cups heavy cream

Berries for decorating cake, Optional

To assemble cake:

Once both cake layers, simple syrup and strawberries have cooled, remove whipped cream frosting from refrigerator. You may flip over, or level top of one cake to be used for bottom layer by carefully carving off "hump" to ensure top layer will sit on bottom layer evenly.
Poke several small holes in top layer of cake with toothpick. Brush each cake layer with simple syrup.
Set aside or refrigerate 15 minutes, until syrup has absorbed.
When ready, place bottom cake layer on cake stand or platter. Frost first layer with whipped cream frosting, pipe extra around the circunference of bottom layer to build "dam". Add strawberries inside of piped dam. Before adding top cake layer, you may add dowels to either side of cake by using wooden skewers cut to size just shorter than the two cakes assembled. Add top cake layer. Frost top and sides with remaining frosting. Strawberry filling may spill out of sides a bit, that's part of the charm. Refrigerate for several hours to set up before decorating with fruit or slicing. Best served room temperature.


Wednesday, June 27, 2012

Happy Summer & Fresh Fruit Margaritas


*I wrote the following several days back, and, as it goes, time got the better of me before I was able to post it. Let me make amends over a drink, won't you?
The weather has cooled and taken on gray, sporadically rainy skies. I don't mind--less work in the garden. The margaritas have taken on different notes, too; Pineapple, Cantaloupe, and the classic, lime. But without a doubt, sweet strawberry and refreshing watermelon-cucumber remain our very best loved.

Well, it's that time of the year again...Summer in the city. And true to form, she arrived wearing her favorite fiery red dress.
I lived in desert country, Arizona one summer with my Mom where the temperature soared to 126 degrees F. You could fry an egg on the street, it was so hot. But you expect that heat. And it doesn't stick cloyingly to your skin like the wrong perfume.

 I find nothing so oppressive as a nearly 100 degree day, sweltering in a small urban city, like Boston, where the already narrow streets feel smaller; teeming with bodies who all derive immeasurable joy walking by open doors of air-conditioned buildings, or the moment when the air is sucked out of you and replaced with relief upon walking into one.

Don't get me wrong, there's a lot of opportunity to seize on days such as this! Any day that implores you to drop whatever you're doing and head to the beach for a swim, or a park with shade for a spontaneous picnic is alright with me.

Besides, I've grown tolerable of the heat. Just as long as I'm finding ways to keep cool. Margaritas are cool. And delicious. Sweet relief at last!

Strawberry Margarita
Recipe Adapted from What's Cooking America


About 18 hulled fresh strawberries (1 and 1/2 heaping cups)
3-4 Tablespoons sugar, depending on the sweetness of your berries (I use 4) 
8 ounces 100% blue agave silver tequila
6 Tbl fresh-squeezed lime juice
6 Tbl  Triple Sec
Lots of ice (about 1 to 2 cups ice cubes)**
Coarse salt or sugar, for rimming the glass
Whole fresh strawberries, garnish
Lime slices garnish


Preparation:

Slice strawberries and place in large bowl. Add in sugar and stir. Cover bowl and allow to macerate for 4 hours, or overnight.

Add macerated strawberries with juice, tequila, lime juice, triple sec and ice to blender; blend until smooth.
Rim glass of choice with either margarita salt or coarse sugar. I used turbinado sugar. Rub slightly rim of glass with lime wedge, just until moist. Tip glass upside down into a bowl with either salt or sugar until rim is coated.

Garnish with a whole strawberry and a lime slice (optional).


Watermelon-Cucumber Margarita
Recipe Adapted from Epicurious


  • 1 1/2 cups 1-inch chunks rindless watermelon
  • 6 (1/8-inch-thick) slices English hothouse cucumber
  • 15 large fresh mint leaves (I mixed sweet and citrus mint)
  • 1/2 cup 100% blue agave silver tequila
  • 1/4 cup fresh lime juice
  • 3 tablespoons *Simple Syrup
  • 1 tablespoon Cointreau or other orange liqueur, like Triple Sec
  • 2 cups ice cubes, divided
  • 2 small watermelon triangles, each skewered with 1 cucumber round (for garnish)
  • 2 fresh mint sprigs (for garnish)


  • *Simple syrup is equal parts sugar and water boiled to dissolve sugar. Add 1/4 cup water and 1/4 cup granulated white sugar to medium sauce pan over medium heat. Bring to boil, stirring, just until sugar dissolves. Set aside to cool.
    Directions:
    Add watermelon, cucumber and mint leaves into a medium bowl. Use muddler or back of wooden spoon and and press down firmly on ingredients continually, until mashed. Add in tequila, lime juice, simple syrup, and Cointreau. Strain ingredients into colander over large bowl. With a very clean hand, squeeze watermelon-cucumber mixture to release any remaining juice. Taste margarita liquid and adjust for sweetness as needed, or alcohol. Add in 1 cup of ice and stir. Pour over glasses with ice rimmed in margarita salt or coarse sugar, like turbinado. Garnish with watermelon, cucumber and mint sprigs.

    Tuesday, May 22, 2012

    Paint, Grow & White Pizza with Arugala


    We've had a pretty productive month around these parts. We finally selected a beautiful color for Barrett's nursery and I'm now in the midst of all that prep work. Also, on a whim I decided to paint the living room too.
    I added more herbs and vegetables to my container garden because I missed not being able to nurture and watch things grow last year while something more blessed and precious was growing inside of me.

    As spring draws to its final weeks, I hope everyone enjoyed a great season and is looking forward to summer.

    If you caught my last post, I mentioned being excited about three new favorite recipes discovered over the past several months. This is the second.

    I had a slightly different pizza I planned on making that featured a lot of the same ingredients, when Food Network posted a link to Ina's White Pizza on their Facebook page. I immediately scrapped whatever I had in mind and forged ahead to make this one. Drawn in by the use of three cheeses, zest of fresh lemon and spicy punch of arugala. I thought the "mess" of greens on top was gorgeous and fun.

    I knew I'd love. I just knew it. I had no idea how much. Since making this pizza, we've had it an additional four times. It's perfect for spring and summer, especially when served alongside fresh cucumber and watermelon margaritas (I'll post that recipe soon). Just divine, I tell you.

    I encourage making this for friends, on the weekend, small parties, because it's Tuesday and you deserve it. Or, just because.

    I know the directions seem a little lengthy, but the process moves along rather quickly. And it's so worth it!

    White Pizzas with Arugala
    Ina Garten via Food Network

    For the dough:

    1 1/4 cups warm (100 to 110) water

    2 packages dry yeast

    1 tablespoon honey

    3 tablespoons Good olive oil

    4 cups all-purpose flour, plus extra for kneading

    Kosher salt

    *I use my own dough recipe, however, kept Ina's recipe here because it is very similar to mine. I use instead:

    1 1/2 cups warm water, 1-2 packages of fast rising yeast, 2 tablespoons brown sugar, 1 tablespoon olive oil, 3 cups all-purpose, plus 1/2 cup whole wheat flour, and reserve an additional 1/4-1/2 cup all purpose flour to add while kneading if dough is too sticky, 1 teaspoon sea or kosher salt.

    For the Garlic-thyme oil:

    1/2 cup good olive oil

    4 cloves garlic, sliced

    5 sprigs fresh thyme

    1/4 teaspoon crushed red pepper flakes

    For the topping:

    3 cups grated Italian fontina cheese (8 ounces) (I used Fontinella)

    1 1/2 cups grated fresh mozzarella cheese (7 ounces) (I would not recommend using pre-grated cheese. A whole block or ball of mozzarella is best.)

    11 ounces creamy goat cheese, crumbled

    For the vinaigrette:

    1/2 cup good olive oil

    1/4 cup freshly squeezed lemon juice

    Freshly ground black pepper

    8 ounces baby arugula (I used an equal mix of baby arugala and baby spinach)

    1 lemon, sliced

    *(From the dough I make four individual sized pizzas (You could also make two large pizzas or 6 small). I usually make two at a time, one for me and one for my husband, who usually eats half of mine. Because this is the case, I reduce this original vinaigrette recipe accordingly, cutting it in half, or even reducing it to 1/4.)

    Directions:

    Mix the dough. *Tips: warm bowl by running under hot water and drying thoroughly before adding ingredients and mixing dough. *To make sure yeast is alive, sprinkle over-top of warm water with honey and oil and allow to foam. Always check dates for your yeast. I store mine in the refrigerator. *Always add flour before adding salt because salt can kill yeast.
    Electric mixer version:

    In bowl of electric mixer fitted with dough hook, add warm water, yeast, honey and 3 tablespoons olive oil. Allow yeast to dissolve. Add 3 cups of flour to bowl and turn mixer on to medium-low speed, add in salt while mixing. While continuing to mix add up to an additional 1 cup of flour until dough becomes soft. You may not need whole cup. Allow dough to continue kneading, approximately 10 minutes, adding small amount of additional flour to prevent dough from sticking to sides of bowl if needed. When ready, turn dough out onto lightly floured large surface and knead by hand 12 times, just to ensure all of the dough is uniformly combined. Return dough to clean, well oiled bowl, turning once to coat, and cover with towel or plastic wrap. Let dough rise 45 minutes.
     
     
    Hand mix version:
    In large bowl, add warm water, yeast, honey and 3 tablespoons olive oil. Allow yeast to dissolve. Add 3 cups of flour to bowl, stir to combine with wooden spoon, add in salt. Add up to an additional 3/4 cup from reserved 1 cup of flour, 1/4 cup at a time, stirring after each addition until dough starts to come together). You may not need whole cup. Reserve remaining 1/4 cup flour. Turn dough out onto clean large, lightly floured surface. Knead dough until it completely comes together. If dough remains sticky, add in additional 1/4 cup of flour while kneading (if necessary.) Continue kneading until dough becomes soft and smooth, about 6-8 minutes. You should feel the dough become lighter as kneading, and more uniform and elastic. Return dough to clean, well oiled bowl, turning once to coat, and cover with towel or plastic wrap. Let dough rise 45 minutes.

    Make Garlic-thyme oil.

    In small saucepan, add 1/2 cup olive oil, sliced garlic, fresh thyme sprigs and red pepper flakes. Allow to simmer over low heat for approximately 10 minutes, until garlic has rendered out some of its natural juice, but remains soft in appearance. Garlic will brown and burn very quickly. Be mindful to watch your oil and remove from heat if garlic cooking too quickly. Put aside.

    Make sure your oven is clean. Set oven to 500 degrees to preheat.

    Making dough portions.

    When dough has risen, punch down dough and turn out onto clean surface. Divide into 6 equal pieces (or 4, if you'd like to make smaller individual, or two large). Unused dough can be refrigerated for several days.

    On large sheet pan lined with parchment paper and lightly oiled, press and stretch dough into 8-inch circle shape, repeat with another dough portion. Two rounds of dough per pan. Cover with plastic wrap (or damp towel) and allow to rise 10 minutes, or 30 if using refrigerated dough.

    To top dough.

    Once garlic-thyme oil has cooled, remove thyme from stems and toss stems. Give oil a stir and brush entire surface of each pizza with oil. Leaving some for drizzling over-top. Sprinkle pizzas with salt and pepper. Top each pizza equally with the three cheeses, fontina, mozzarella and then goat cheese crumbles. Drizzle each pizza with no more than 1 tablespoon remaining oil. Place pans in oven and bake until crusts have become crisp and cheese begins browning to light golden color, 10-15 minutes. Bottom of crusts should be nicely browned.

    Prepare vinaigrette.

    Use whisk to combine 1/2 cup olive oil, lemon juice, 1 teaspoon salt and pepper. When pizzas are ready, toss the greens into large bowl, add only enough vinaigrette needed to moisten greens. Top each pizza with a large bunch of greens and a lemon slice. Slice pizza and serve immediately.

    Tuesday, April 17, 2012

    A New Fave & Chocolate Coconut Sorbet


    Hi Friends,

    I hope everyone has been doing wonderfully since my last post. I also hope you, my friends have been able to get out and enjoy these first weeks of spring (at least, those of you in parts of the world where spring has sprung).

    I've been away from the blogospehere for just over a month and a half now, but, with good reason. Several posts' back I mentioned becoming sick after my son was born last July...Well, since then there has been a diagnosis. Nothing major to report; Complications most likely brought about by the emergency c-section. I've been put on a two month course of meds and will shape up just fine. I'm feeling heaps better already.

    Also, I had a lot of making up to do with my family who had to deal with a Mom and Wife who couldn't spend the time with them I wished while I was in the "thick of it". They took such good care of me, I really owe them the world.

    My husband has been reaping the benefits of home cooked meals again. And happily resumed his position as my personal "taste tester".
    Barrett, recently reached his 9th month and got his first tooth on the same day. After months of "Dada", "Dad", and "Daddy", I heard "Mama" for the first time this past Sunday. If possible, he's even more adorable than ever. He's full of so much life, curiosity and personality. It's infectious!


    Lastly, I started my garden. We can't wait to start eating homegrown fruits and vegetables around here again.

    So, you see, I was away for a while but not without good reason.

    And I don't return empty handed either, my next three posts are all new favorite recipes I recently discovered and can't get enough of.

    It's sunny and warm here in Boston. Perfect day for ice cream. This Chocolate-coconut Sorbet was an instant hit. Picture your favorite chocolate cookie dough, now a brownie, and then an almond joy candy bar. Now imagine the best of all those things combined for one heck of a yummy frozen dessert that you cannot believe doesn't have dairy. It's creamy, delicious and oh so good.

    Chocolate- Coconut Sherbet
    Recipe courtesy The Perfect Scoop by David Lebovitz via CHOW


    Ingredients:


    1 cup water
    1 cup sugar
    5 ounces bittersweet chocolate (use your favorite)
    2 cups canned Thai coconut milk
    1 tablespoon dark rum
    1/2 cup whole almonds lightly roasted and chopped (optional)
    *Sometimes I add coconut, but the texture is awesome without it, so I've left it out of the recipe here.

    *Lighly toast whole almonds in preheated 350 degree oven for 8-10 minutes. Allow to cool, chop and set aside.


    Instructions:
    1. Chop chocolate coarsely and set aside.
    1a. In medium to large sauce pan, add water and sugar and heat until water has totally dissolved.
    2. Once sugar has dissolved, add in chocolate and stir with whisk until chocolate melts entirely. Remove pan from heat, add in coconut milk and rum, stir to combine.
    3. Place liquid mixture in refrigerator to cool thoroughly. Pour cooled mixture into ice cream maker and freeze according to manufacturer's instructions.
    Note: I stir my coconut and almonds into the ice cream mixture once it's done churning. If your ice cream maker allows you to add things, like nuts or chocolate chips, while your mixture is churning without compromising your machine, please feel free to do that.
       

    Thursday, March 1, 2012

    ...in the Beginning & Cinnamon Swirl Bread


    I didn't really start baking, and with passion, until I began blogging. Though I've improved lots since then, I still think of myself as fairly novice. There's so much to learn and so many sources to be inspired from. I love learning about every aspect and the science behind baking...especially bread baking.

    Few things are more thrilling to me than working a ball of dough with your hands and getting it to the point where the protein relaxes and the dough becomes smooth. And when you've done it enough, you can feel it happen with your eyes closed; Letting the dough rise again before it's ready to go into the oven, maybe a splash or spray of water to form a beautiful golden, chewy crust and, before you know it...you've been transported into another time, another place-- where grocery stores, refrigerators, preservatives didn't exist.

    When my bread is done I like to pretend I'm pulling it out of an outdoor stone oven, and inhale whatever magical scent if wafting through the air. Like cinnamon. For those reasons, I would resist using a bread machine(even though I understand the convenience). Maybe your loaves are imperfect or misshapen, but they're yours. You've invested the time. And boy don't you feel proud.

    Harvest Squash Bread

    Honey Oatmeal Wheat Bread

    Cinnamon Swirl Bread


    Recipe courtesy and adapted from Baby Center

    Ingredients:

    1 1/2 cups warm water
    2 tablespoons milk
    2 tablespoons butter, cut into pieces and softened
    1 teaspoon salt
    4 cups bread flour
    3 tablespoons white sugar
    1 teaspoon cinnamon
    2 teaspoons active dry yeast
    (*Note: I replaced 1 cup of bread flour with 1 cup of whole wheat flour because I like the texture.)

    Filling:

    1/3 cup brown sugar
    2 teaspoons ground cinnamon
    2 tablespoons unsalted butter, melted


    Directions:

    1. Add milk, butter, granulated sugar,1 teaspoon cinnamon and warm water to large bowl. Stir to dissolve sugar. Sprinkle yeast over top of water and allow to foam, 3-5 minutes. Stir salt into flour. Pour flour into bowl with water slowly and stir just until ingredients begin to incorporate. Remove ingredients from bowl onto clean counter or other surface with a good amount of space and knead dough for about 5-10 minutes, or until ingredients have incorporated completely and dough feels smooth.

    Return to clean bowl and cover until dough has doubled in size. About 1 hour and 15 minutes.

    2. Mix brown sugar and remaining cinnamon for bread filling.

    3. When dough is ready, gently remove from bowl to a lightly floured surface and form dough into rectangle shape. Brush entire top surface of dough with melted butter and evenly cover with cinnamon/sugar mixture. I added chopped walnuts to half of the dough. Beginning with long end of dough, roll into log. You can pinch the seam closed if you'd like. Cut log in half, into two separate loaves. Fold ends of logs under to seal. Into two lightly greased 9x5 inch bread pans, add loaves. Cover pans and allow loaves to rise in warm place until size has doubled, about an hour.

    4. Allow oven to preheat at 350 degrees Fahrenheit.

    5. When loaves are ready, brush tops with melted unsalted butter and bake for 30 to 40 minutes, until bread tops have turned golden and bottom of loaves sound hollow when tapped.

    Allow to cool completely before slicing. I especially loved this bread toasted, spread with butter and sprinkled with cinnamon-sugar.


    Tuesday, February 14, 2012

    Happy Valentine's Day & Black Forest Cake


    As promised, this is the second of two Valentine's Day desserts (that would be perfect to serve any day). The first of which being a rich and decadent Hazelnut Torte I served topped with ganache and gently whipped cream. This time, I took a sweeter approach for something really special to serve to my love on this Valentine's Day. My husband adored the cake. So much so that he awoke and requested it for breakfast...while reciting lines to the best of his recollection from one of my favorite Pablo Neruda poems.

    May you awake in love to something sweet and poetic everyday.

    Black Forest Cake


    Cherries

    24 ounce (700 ml) jar of Morello Cherries in syrup, or jar of sour cherries (I found mine at Whole Foods)

    4 tablespoons Kirsch or Cherry Brandy

    1/4 cup (50 grams) granulated white sugar


    Directions for Cherries:

    Drain the cherries, reserving the liquid. Place the cherries in a bowl and toss with 2 tablespoons Kirsch. Cover the bowl with plastic wrap and set aside. Place 1 cup (240 ml) of the reserved cherry syrup in a small saucepan, along with the sugar, and heat until sugar has dissolved. Remove from heat, add 2 tablespoons Kirsch, and let cool.

    In colander (or using hand) over medium bowl, drain cherries. Save liquid. In separate bowl, add cherries and combine with two tablespoons Kirsch. Cover bowl and place aside. Add one cup of saved liquid from cherries into pan with 1/4 cup sugar. Heat on medium until sugar has dissolved. Move pan off heat and add in two tablespoons kirsch. Allow to cool completely.
    Recipe courtesy and adapted from Joy of Baking


    Proceed with cakes.

    Cake Ingredients:

    2 cups white sugar
    1 3/4 cups all-purpose flour
    3/4 cup HERSHEY®'S Cocoa Powder
    1 1/2 teaspoons baking powder
    1 1/2 teaspoons baking soda
    1 teaspoon salt
    2 eggs
    1 cup milk
    1/2 cup vegetable oil
    2 teaspoons vanilla extract
    3/4 cup boiling water

    Cake Directions:

    1. Set oven to 350 degrees Fahrenheit and allow to preheat. Line two 9-inch cake pans with parchment paper, or coat with butter, then flour, turn and gently tap to remove excess flour. I like to both line with parchment and butter and flour.

    2. In a large bowl, combine sugar, flour, cocoa, baking powder, baking soda and salt. Stir to combine. Pour in eggs, milk, oil and vanilla and beat with mixer on medium speed until ingredients fully incorporate. Carefully stir in (I a used fork) boiling water. Batter will become thin.

    Equally divide batter between two prepared cake pans.

    3. Allow cakes to bake for 30-35 minutes or until a cake tester/toothpick inserted into middle of cake removes clean. When done, allow cakes to cool ten minutes in pans. Transfer cakes from pans onto a wire rack and let cool completely. I put cakes in freezer for about 20 minutes to make sure they were very cool before adding whipped cream.
    Recipe courtesy and adapted from Hershey's via All Recipes.com


    Once cakes have cooled completely, proceed with Whipped Cream Frosting.

    Whipped Cream Frosting:

    2 1/2 cups (600 ml) heavy whipping cream (double cream) (35% butterfat)

    4 ounces cream cheese, preferably Philadelphia

    1 teaspoon pure vanilla extract

    5 tablespoons (35 grams) granulated white sugar

    Whipped Cream Frosting:

    Add cream cheese to bowl and mix on medium speed until broken. Continuing to beat on medium, slowly pour in heavy whipping cream and vanilla. Beat until mixture increases in volume and just begins to become stiff. Add in sugar. Continue to beat until you've formed stiff peaks, or just until sugar is combined.
    Recipe courtesy and adapted from All Recipes.com

    Assemble Cake:

    If needed, slice mound off upside (top) of the bottom layer of cake to flatten and make more steady to support second cake. Brush off excess crumbs. (*Note: Many places instruct simply turning one cake over so that the bottom of cake becomes the top, but I find that if your cake baked with a slight mound on top, the cake will not sit as flat on cake plate or dish, but if you don't have that issue, you can simply turn bottom layer of cake over and proceed with directions normally.) Brush top of the bottom layer of cake with 1/4 cup of reserved cherry syrup with Kirsch you made earlier.
    Spread one cup of whipped cream over the top of moistened cake. Cover whipped cream with Kirsch soaked cherries. Turn over top layer of cake, so that the bottom is facing up, and brush with 1/4 cup of reserved cherry syrup. Place moistened side of cake (bottom) on top of cherries and whipped cream. Press down gently. Set one cup of whipped cream aside and frost cake with remaining whipped cream. Add remaining 1 cup of whipped cream to pastry bag and, using large star tip, pipe rosettes around top of cake. Decorate with cherries, fresh or maraschino, and chocolate shavings and Refrigerate for several hours or overnight covered before serving.

    Saturday, February 11, 2012

    Celebrate Love & Chocolate Hazelnut Torte


    This is the first of two (delicious, chocolate) Valentine's Day desserts. Everything is better in pairs. And I do have two special loves this year. Although, one of them is not yet old enough and will have to settle for the organic carrots Mommy made for him in lieu of cake. Daddy will be happy to eat his share.

    Every day I wake up to Barrett's beaming, smiling little face and my wonderful husband, I fall in love...again and again.

    With this, who couldn't...


    For me, every day is an occasion worth celebrating because it is within that love, I get to live my dream come true.

    I never subscribed to the commercialism of Valentine's Day; cards, candy, flowers, but the celebration of love, I know what that's all about, and there's nothing sweeter.

    Dear friends, May you be every day~living out your dreams in love.

    Chocolate Hazelnut Torte:


    Recipe courtesy and Adapted from Joy of Baking

    1/2 cup (70 grams) hazelnuts

    1/4 cup (30 grams) all purpose flour

    1/4 teaspoon salt

    4 large eggs

    6 ounces (170 grams) semisweet or bittersweet chocolate, chopped

    6 ounces (170 grams) unsalted butter, cut into pieces

    3/4 cup (150 grams) granulated white sugar (divided)

    1 teaspoon pure vanilla extract

    1/4 teaspoon cream of tartar


    Toasting Nuts: Turn oven to 350 degrees to preheat, making sure rack is placed in center of oven. Add nuts to baking sheet and place in oven for about 15 minutes or until skins begin to crack and loosen from nuts. Remove baking sheet from oven and add nuts into a clean dish towel. Twist towel so no air can get in or out and allow nuts to steam for 5 minutes. Use towel to remove the skin from nuts by rubbing. I could not get them all off and that was fine. Allow to cool.

    Ground Hazelnuts: When your hazelnuts have cooled completely, add into food processor, including flour and salt, pulse until hazelnuts are finely ground. Put aside.

    Prepare and Bake Torte: Turn oven temperature up to 375 degrees. Prepare 8 x 3 inch springform cake pan by lining with parchment paper. I used a tart pan.

    While eggs are still cold, separate, placing egg whites and egg yolks into different bowls. Allow to come to room temperature covered.

    Add chocolate and butter to heatproof bowl and place on top of saucepan of simmering water. Stir while chocolate melts and remove from heat. Set aside.

    Combine egg yolks with 1/2 cup sugar in bowl of electric mixer or, using hand mixer and bowl, beat until mixture becomes thicker and pale yellow in color, about 3-5 minutes. (Lifting beaters from mixture should create silky ribbon.) Mix in vanilla extract. Using rubber spatula, fold in melted chocolate mixture and nut and flour mixture, taking care to be gentle. Put aside. In clean, preferably glass bowl, use whisk attachment to beat egg whites, mixing on medium speed. When egg whites become foamy add in cream of tartar. Beat continuously until soft peaks have formed. Slowly add in remainder of sugar, 1/4 cup, with mixer turned to high, and beat until egg whites just become stiff.

    Lighten chocolate mixture by folding in small amount of whisked egg whites. Fold in remainder of egg whites quickly. Be careful to gently incorporate just until mixed as to not deflate batter. Add batter into prepared pan and level top.

    Bake 40 to 45 minutes, or until inserted toothpick in center of cake removes with moist crumbs. Allow torte to cool completely on wire rack. Once cooled, torte will fall in center and may crack on top. This cake is dense and moist. I liken it to a hazelnut brownie. I served it with homemade ganache and gently whipped cream. So good!

    Thursday, February 9, 2012

    An Update & A Sweet and Simple Salad


    Dear Friends,

    May I just start by saying how much I've missed everyone. My last post was just before Christmas, which means I didn't get to wish you all a very happy and vibrant new year. I hope the start of 2012 has shown a lot of promise and reason to look ahead.

    My new year has been dedicated to restoring my health, hence my absence. Ever since giving birth to the love and light of my life, my son Barrett, last July, I became increasingly ill. This affected my life drastically and limited what I could and could not do as I did my best to navigate being a Mom, wife and continuing to do the other things I love, like cooking, while being sick and enduring test after test in pursuit of a diagnosis.

    I'm happy to say, I've adjusted and getting a lot better at managing to cook, document, keep pace with a highly active 7-month old, and slowly incorporate all of my old passions back into my life in spite of everything else.

    This post was mostly about catching up, but I'm also including a quick and yummy salad.

    Since I've been gone...

    We celebrated our first Christmas together.


    Barrett got to experience his first snow.


    His first taste was carrot.


    He loves his monkey and the quilt his "Gigi" made for him.


    We took him to one of our favorite places, the Museum of Fine Arts, Boston.


    And he took his first ride in a swing.


    I'll be back with new dishes, and more Milk, Sugar, Musings & Love(s) of my life soon. In the mean time...

    Cranberry Walnut Salad with Raspberry Vinaigrette

    Mix of greens, your choice
    Handful dried cranberries
    Small handful of candied or lightly toasted walnuts
    Chopped feta cheese
    Top with pita chips

    Raspberry Vinaigrette

    I used this recipe and whisked in 4 raspberries.

    Honey-Vinaigrette Dressing

    Ingredients:

    ½ cup extra-virgin olive oil
    ½ cup red wine or distilled white vinegar (I used the latter)
    2 tablespoons Dijon mustard
    2 tablespoon honey
    1 tablespoon red onion or shallot, finely chopped
    1/2 teaspoon salt
    1/4 fresh ground black pepper

    Directions:

    In medium bowl, whisk together vinegar, honey and mustard. While continuing to whisk gently, add in oil slowly. Add in onion, whisk again. Repeat after adding salt and pepper. Whisk again gently just before serving over salad.
    Related Posts with Thumbnails